
I am all caught up on my planting and sowing. Phew! It has been spits and spurts as I work around the puppy’s schedule. I figure that if I have to be out with here 10 times a day, I might as well get something done each time we go out ; )
I am still sticking in flower seeds here and there, wherever I see an extra spot to put a sunflower or a couple of zinnias.
Honestly, it was so cold and windy last week, that I had little desire to be out there at all. If it were not for having to take the puppy out, not much would have happened until that wind died down. It makes me crazy! Does this happen to anyone else? I get bone tired and down right cranky when it is windy.
Here’s a good, long read full of ideas and going’s on for the month of June. I could add more, but I think I need to make the rest of my thoughts into another post, hahaha.

The north sideyard is looking nicer now than it has since we moved in! We divided a super large hosta and put the ‘chunks’ in that bed. They are thriving, growing an inch or two a day with all the new attention they are getting from me, plus the warmth and sunshine.
The lady’s slipper is really thriving this year, first time since we have been here!

We will be tidying up this north side foundation bed (with the hostas and ferns) after the front yard is complete. Making it more narrow, putting in a sharp edge between it and the lawn, adding more compost, and then topping it all off with fresh mulch.


Hubby had a ‘long weekend’ so we were able to get the front yard started. This is as far as we have gotten so far. The sod and sprawling junipers are gone. The paver pathway has been laid. We have started layering on some lovely compost to help everything thrive once planted… and that is it so far. Hopefully will get it planted up and mulched in this weekend!

Having said that… though we always have a project on the go, this month’s main message is to be a lazy gardener! Meaning that when you start to work WITH nature instead of against it, that is when the magic happens and you start to really enjoy your garden. I have mentioned this before, but try not to worry about a few holes, a few imperfections. Nature is not perfect.
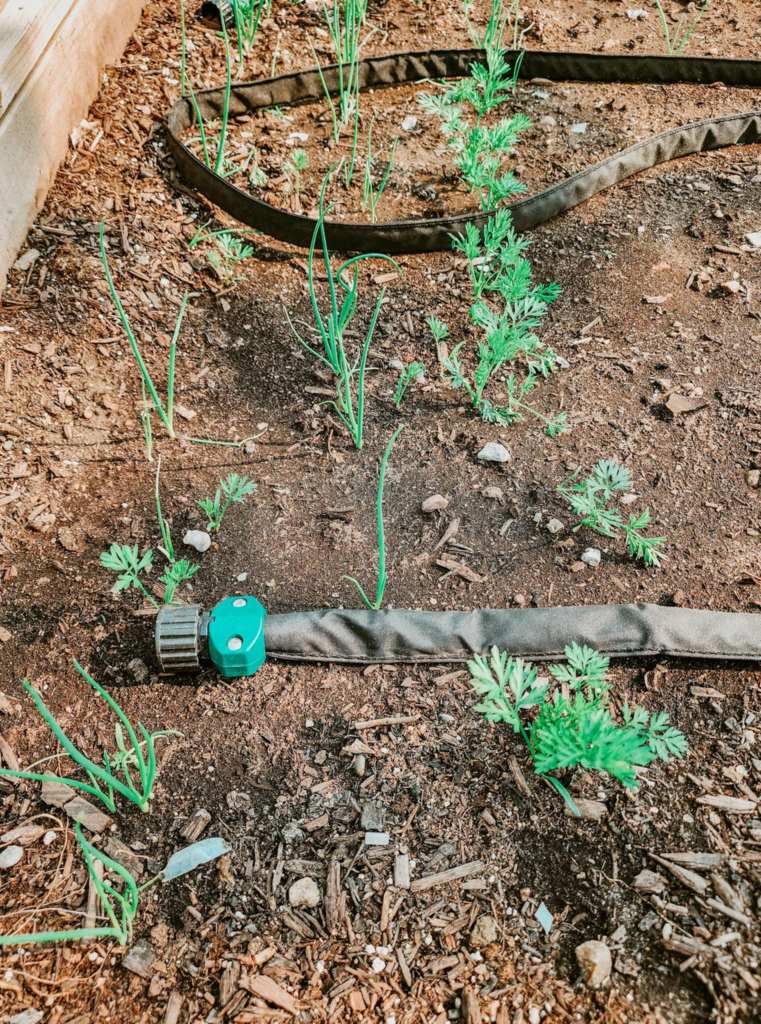
Here is a story about when I found aphids on my early dill… As I was out in the garden planting, watering, sowing and such, I noticed that some of my dill had some twisting going on. Of course, that is a sure sign of aphids.

I kept on weeding and working, putting down the weeping hoses, and as I worked, I noticed that the clean up crew was there, as well. The lovely ladybugs were working their magic, doing their thing. Had I rushed off to grab a hose or something to blast off the aphids, I might have missed seeing the ladybugs altogether.
If I had gone rushing off to go out there with a (safe and organic) soap spray to deal with the aphids, how many ladybugs and other small predatory insects might I also have killed?
Some of these beneficial insects (that we are attracting to our gardens with the companion flowers that we planted) are very very small. You have to sit a spell, watch a while, really pay attention to know that they are there.
But… if you don’t see them, how do you know they are there? Simple… you have very few pests, very little twisting, very few holes. Organic gardening sometimes means having faith … if you leave it, they will come.
Now, what would I have done about the twisting dill at the end of the day if I had not seen the ladybugs doing their thing? Truly, absolutely nothing ; ) Call it lazy gardening, if you want, I sure do… but I also trust in my healthy organic garden and my plantings of companion plants.
A bit of twisting does not stress me out, a few holes here or there do not stress me out. I never ever get a lot of pest issues, and if I do, the most action I would ever take in my food garden is picking and squishing or drowning (those darned stink bugs).
Plus I can just swish the dill off in water before I use it, all is well ; )
Please do not run for the sprays. They do not discriminate, they kill everything. I have seen bees land on a rose that was sprayed with soap spray earlier on, the spray was already dry yet the bee dropped dead within minutes of landing on the rosebud.
Trust in your gardens, your plantings, have faith…. or, if it stresses you out to do nothing, start squishing ; )

Vegetables
- Set out your weeping hoses or drip systems to deep water your veggie beds once or twice a week. This will give you the best tasting veggies, and they will thrive much better than if they get multiple shallow waterings.
- If, like me, your seedlings are still young and you just got your seeds in, water by hand daily until you see your carrots germinating, beets coming up, new growth on your seedlings to indicate that they have rooted in well and are now setting deep roots and growing.
- Do some succession sowing of peas, carrots, beets, lettuces.
- Sow a few more dill and cilantro seeds. Cilantro will bolt readily in the heat, sow new seeds in a part sun location for longer lasting leaves. Bees love the cilantro flowers, so leave a stem or two standing after they bolt.
- Plant your bush/pole beans. They will germinate quickly in the warm soil.
- Water garlic once a week till bottom leaves start to yellow. You want to stop watering your bulbs the last 2 or 3 weeks before harvest so that the bulbs are not bloated with water and cure well. If they are very wet at harvest, they are prone to blue mould and are less apt to cure well.
- Water asparagus once a week till late summer. Leave the fronds standing until the begin to turn yellow/brown.
- Keep harvesting lettuces, spinach, peas… the more you pick, the more they make. If you stop picking, they will quickly go to seed.

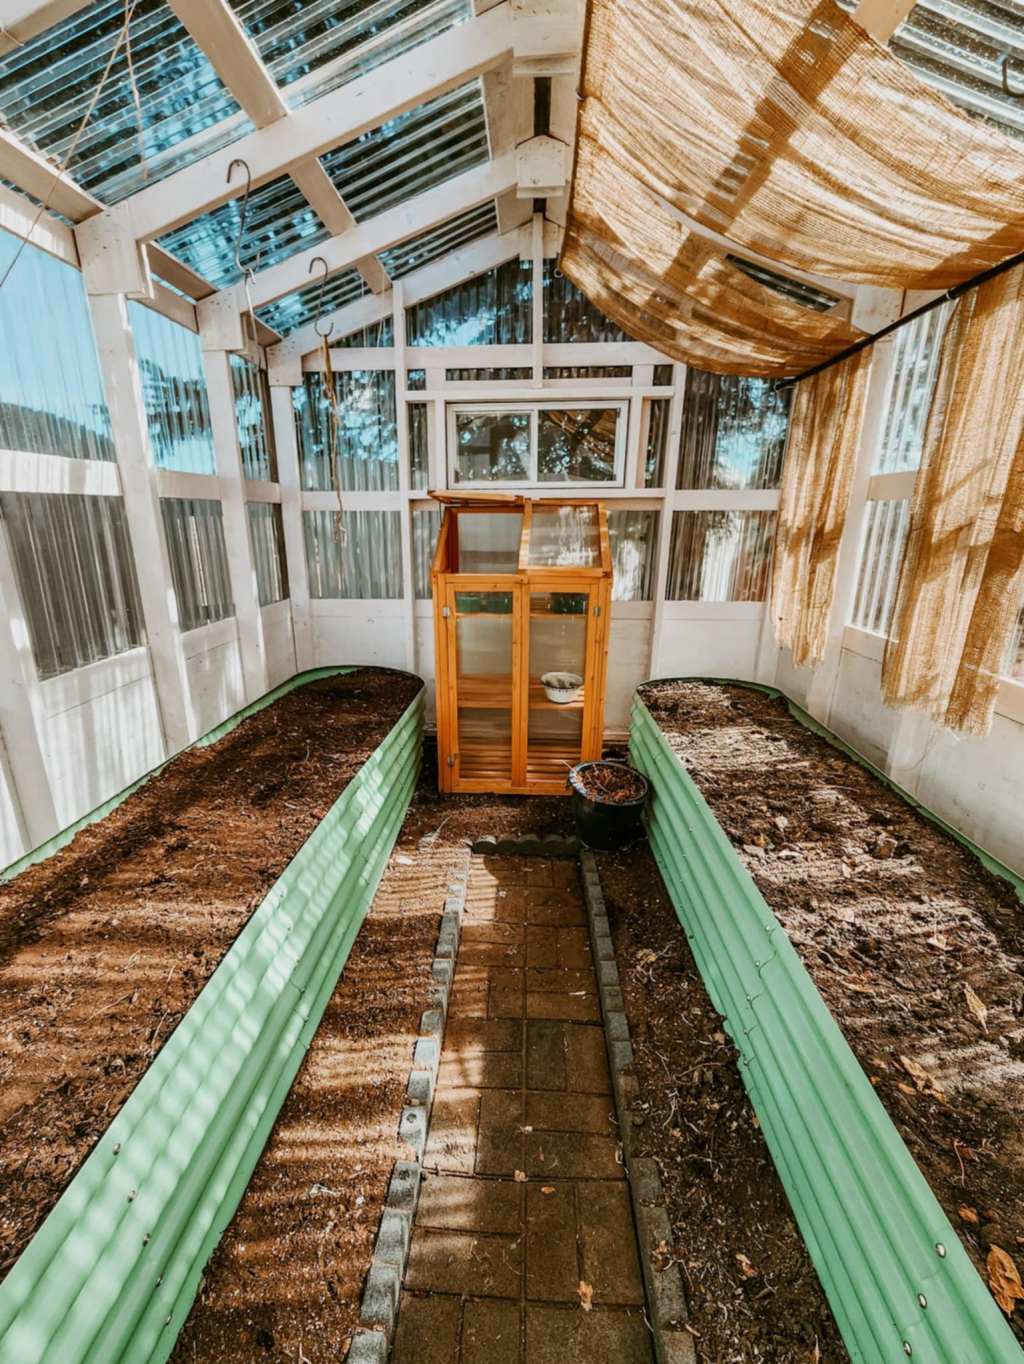
In The Greenhouse
The potting shed is finally empty of all plants. They have been hardened off in the greenhouse, or outside, and most all have been planted up or sold.
- The spinach and radishes have bolted and been pulled out of the greenhouse. The only spring sown veggies left in there are the spring onions/green onions and a couple of types of lettuce that are still thriving nicely.
- I kept 2 radishes as I want the radish pods – juicy green little pods that look a bit like pointy short pea pods.
- Pollinators and other beneficial insects love the flowers of bolted radishes (broccoli, cauliflower, and cilantro, too) so leave a few standing for your organic pest control and great pollination.
- Peppers were planted over a week ago and are starting to flower, even though our temps have not been amazing. Barely staying at plus 10°C at night.
- Eggplants are in but are taking longer to settle in. I am not worrying about that though as I know, when they take off, they will grow really quickly. It is early days yet.
- Cucumbers are growing in really large pots (20 and 25 gallon black grower pots). I have little gherkin type cucumbers growing for pickling, and long English types for fresh eating. I think I need to grow a few slicer cukes somewhere, too, as they are the best for making quickles (quick dill fridge pickles).
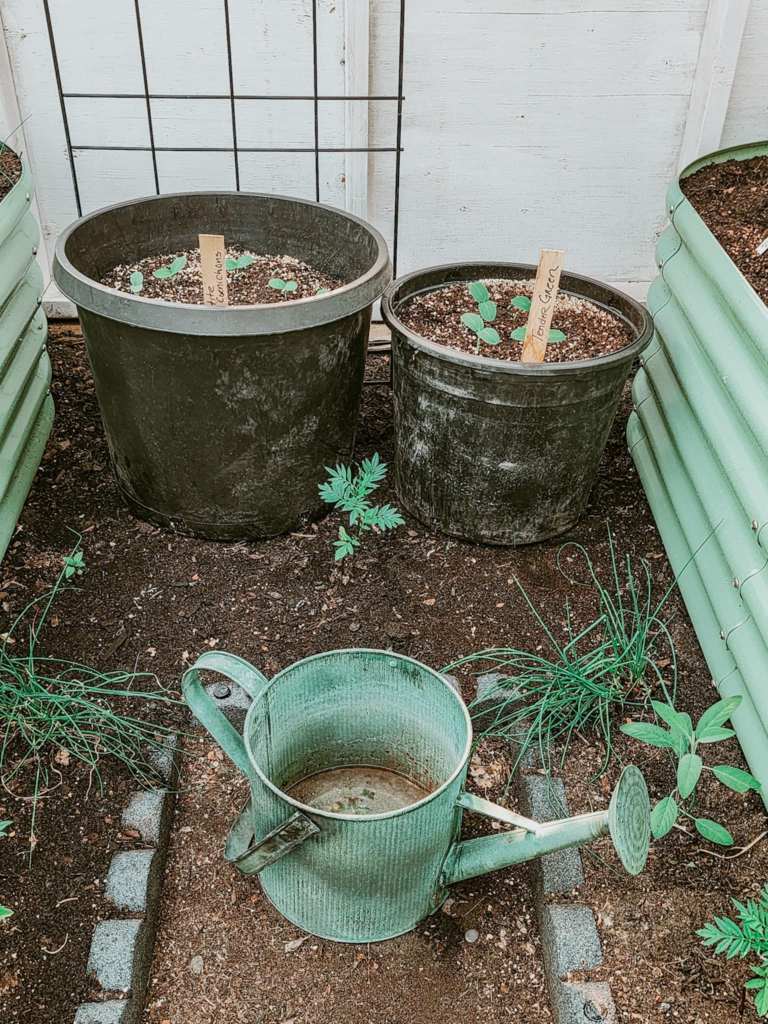

As the greenhouse has this 3 foot tall sidewall, we found that plants struggled to take off in spring, while temps were still cool. The ground gardens were dark, did not get direct sunlight, and thus, the soil stayed cool for a long time. To do it again, I would have the clear panels go right down to the ground.
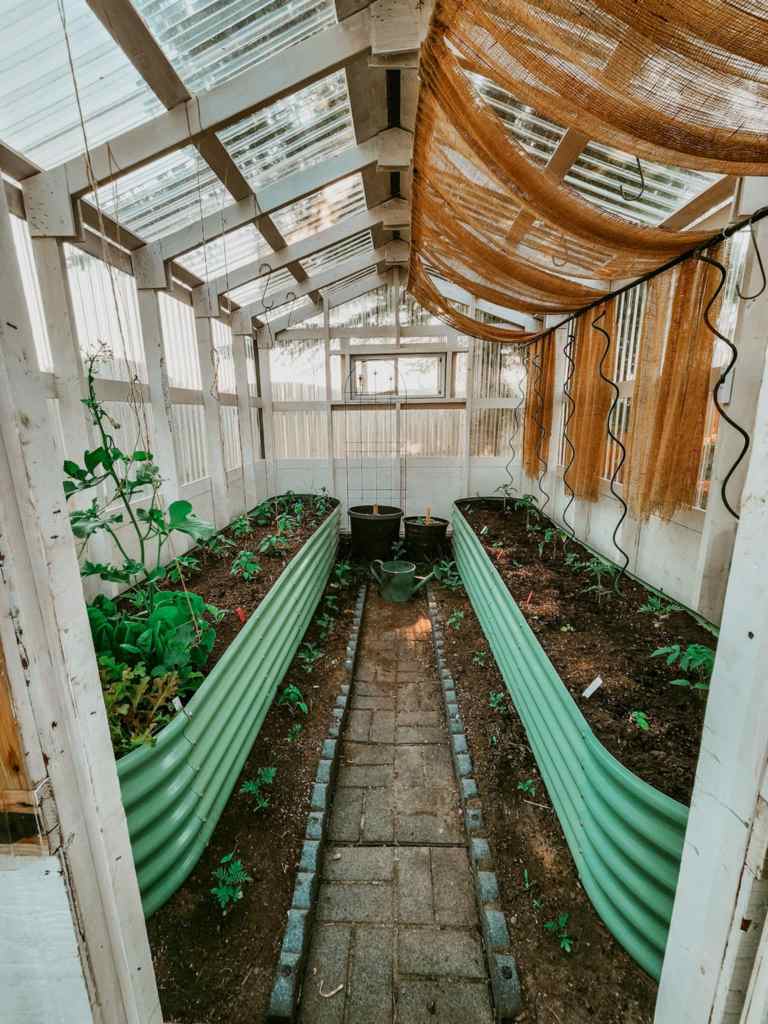
We put in two lovely green, metal raised beds on either side and now everything is thriving. At the back, we grow things in big pots for now, will see if that is how we continue to use it. I kind of want to put a zone 4 David Austin rose back there… Along the sides of the pathway is where I grow flowers and herbs for the pollinators.

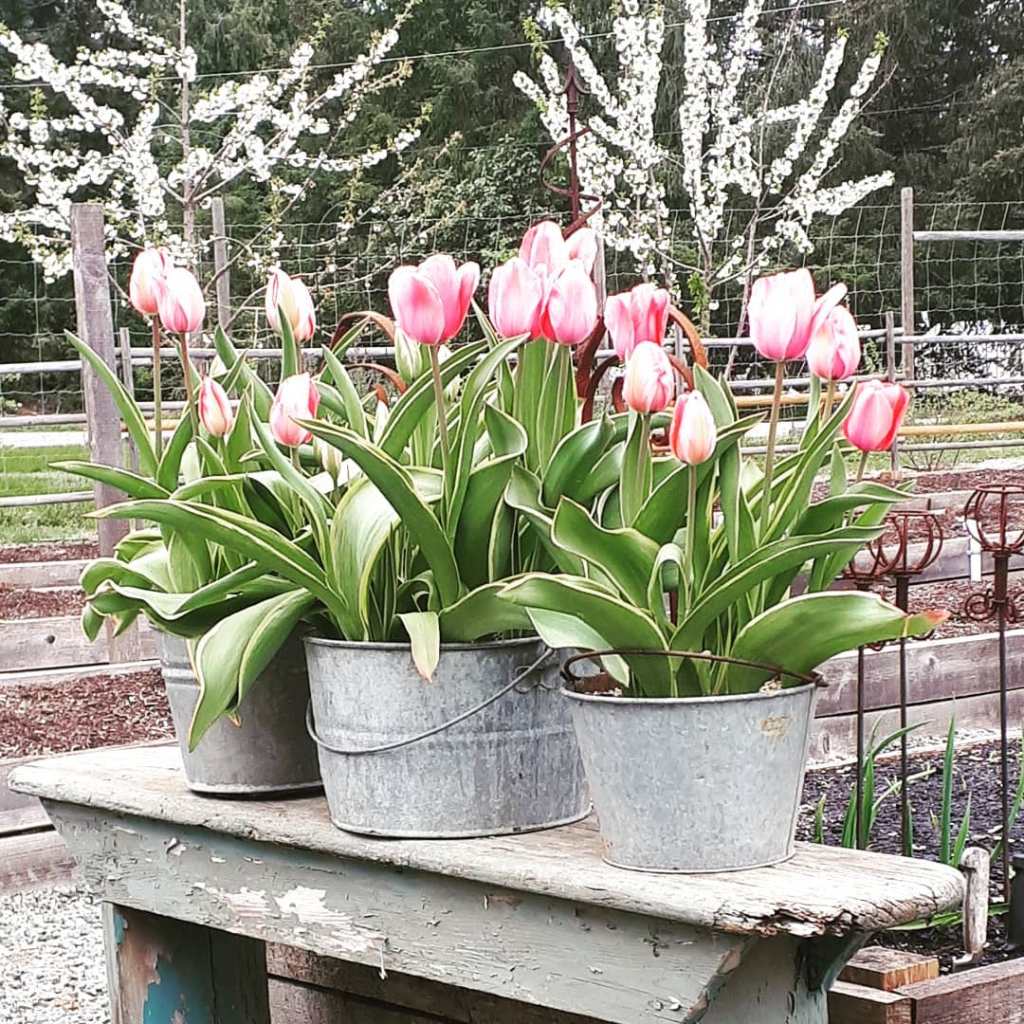
Flowers
- Deadhead spring bulbs by removing the flower stalk, but leave the foliage to yellow off before removing. Alternately, remove the stalks, lift the bulbs while leaving the foliage intact, place in a pail or tote, put in the shed or garage for the summer, replant in fall (remove dried foliage and clean off bulbs).
- It is finally warm enough to plant out your dahlia tubers.
- We here on the prairies are still waiting for everything to flush out, but some of you have been enjoying the blooms of verbascum and other early bloomers for some time now. There are many many perennials that will give you a second, and sometimes even a third, flush of blooms (depending on your location). Verbascum is one, as is lavender. Cut them down when they have finished blooming for new blooms in a few weeks’ time.
Here is a fun read/podcast about bees. Check out some of the different looks of native bees. Here is another interview with Heather Holm about native bees. Oh, and did you know that they like to nest in pinecones and snail shells?

- Hanging Baskets, flowers in pots – At the beginning of the season, when you have first potted up your baskets and pots with young plants, only water once or twice a week.
- The young plants are not very big yet and have small roots systems, so are not yet using a lot of water. On sunny or windy days, they may dry out a bit faster but if the days are cool and grey, the will not be drying out very quickly.
- What is the best way to check if they need water? With your finger! Truly! Stick your finger into the soil in the pot, the planter, the hanging basket. If the soil feels damp under the surface, leave for another day. If the top inch or two is dry, you need to give them a good drink.
- Once your baskets and planters are starting to fill out nicely, it is a good time to give them a wee little boost of liquid seaweed/kelp. This will help them fill out faster, bloom more, root in well, make the foliage a deeper green if you are having any yellowing from too much rain and cool temps.
Trees & Shrubs
- Prune lilacs within 2 weeks of them finishing blooming. If you miss the window, leave them be till next year as they make next year’s blooms shortly after they finish up for the year.
- Feed your trees, shrubs, and perennials with a few shovelfuls of compost. No need to dig it in, the nutrients will get to the roots with rain and watering.
- Top up depleted mulch in beds and around trees/shrubs. Leave a few inches of air space between the mulch and the trunk of the tree. No mulch volcanoes, please!
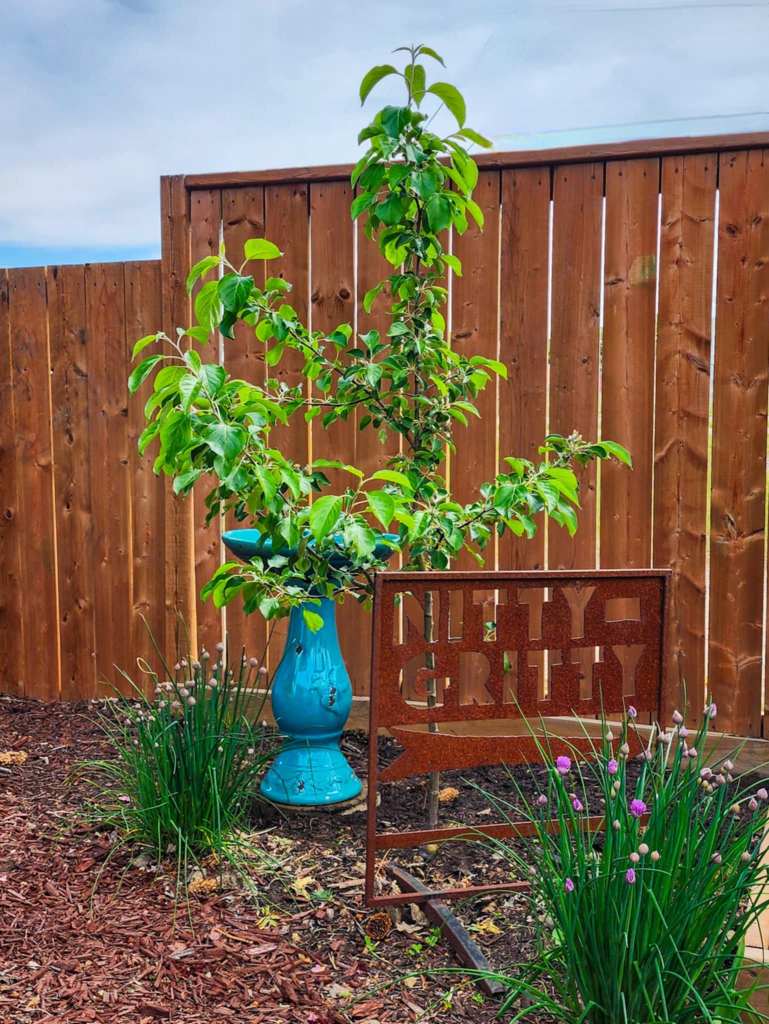
- You may see your apple trees dropping some of their immature fruits this month. This is called June Drop and is very normal, especially if your tree is loaded down with apples. The tree will be unable to sustain all of the apples, so will drop them. It can also happen during a drought. If it is very hot and dry, your tree will be unable to keep all the apples.
- Deep water your trees every 2nd week, if you can. I do it with my young trees, like the apple above, especially while they are making fruits, but do not water established trees.
- If you did not do so earlier in the year, put a shovelful or two of well rotted manure or compost at the base of your trees, shrubs, roses, rhubarb…. they will thank you in spades, with healthy foliage, flowers, and/or fruits.

Yard Tasks
- Clean and fill your birdbaths daily… especially if your dog uses it as a water bowl, as mine does.
- Edge your beds with a sharp spade or garden edging tool.
- Same goes with hummingbird feeders. They should be washed and refilled every day! This is why I do not use feeders. Too much to keep up with on these old arthritic pins, hahaha. I do, however, plant lots of salvia throughout the yard, specifically for the hummers.
- Add water to your compost to keep it cooking. Do not let it dry out.
- Keep weeding. Run your hoe between the rows of your veggies, around your borders and gardens. Dig out dandelions (if you are so inclined) with a dandelion remover. I want one of the long handled ones so that I do not have to bend down for them, but thus far, I have been too cheap to pay for one ; )

Fertilising – When. how, and how often?
Hanging baskets & planters – To keep them blooming, you need to feed them regularly through the summer. Give them a bloom boosting fertiliser that has a bigger middle number once a week, like a 15-30-15.
Garden beds/potager – NOT needed! Plants do not need to be fed in the garden, not at all, not ever. Not the veggies, not the flowers, not the trees and shrubs.
This is the hardest one for most of us to grasp as we have been conditioned by the industry to believe we need to keep feeding throughout the season for a good harvest. We are bombarded with commercials that tell we need to use their product (you all know which company I mean) to get bigger, better veggie crops. This is absolutely not true, they just want to sell you their product.
Organic gardening is all about feeding the soil which in turn feeds your plants for happy, healthy, thriving plants. If you have been feeding your soil annually with organic matter like compost or manure, you do not need to additionally feed your plants. You have already invested in good soil by feeding the soil life, you do not need to spray or water the plants in with anything else. Grow your groceries like grandma used to!
If you want, you can additionally feed your soil at planting time, when you plant your seedlings you can toss some manure, compost, or other organic matter into the planting hole or trench. You do not need to do this, it is just an option if you feel the need to feed.
However… if you have inherited less than spectacular soil, have really poor soil that you have not yet had time to improve, or your plants are looking peak-ed this summer, here are several option to feed your organic garden.
- Feed with a side dressing of manure. This gets distributed to the roots by the soil life and with each rainfall or watering. This applies to veggies, trees, shrubs, roses …
- Give them a foliar feed (spray on the leaves) of liquid seaweed.
- Water them in with a manure or compost tea.
- Feed them with an organic slow release fertiliser that you scratch into the soil.
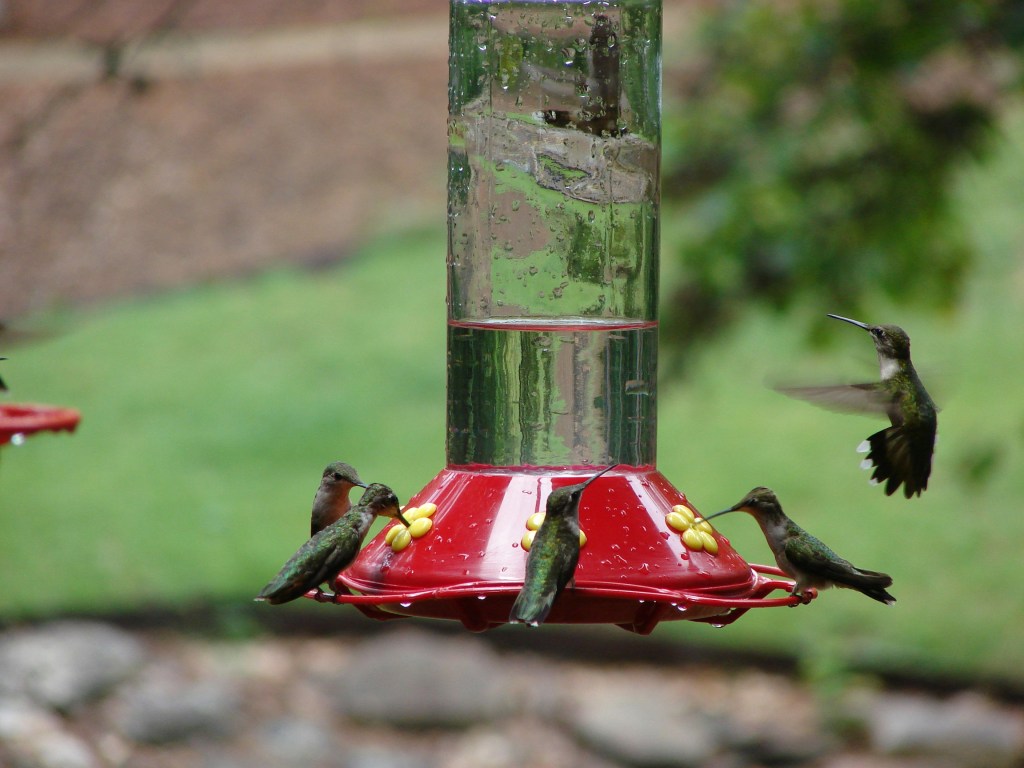
- When buying a hummingbird feeder, buy one that holds a small amount of sugar water as you will be changing it daily.
- Easy to clean is a thing, choose a feeder that is simple, without a lot of extra bits to clean. Get a bottle brush to get the inside. The flat hummer feeders are easier to clean, and they do not get wasps.
- Are ants a problem? Hook it up on a shepherd’s hook.
- One cup sugar to 4 cups water, never use dyes, brown sugars, honey, or other sweeteners, just white sugar.
Planting and Sowing…
Wondering what you can plant now from SEEDS? Much more than you probably thought. I have just finished up, was still in the thick of it till just the other day.
– Beans (pole beans take about 100 days to mature, bush beans are much faster at 50 days)
– Beets
– Broccoli
– Cabbage
– Carrots
– Corn
– Cucumbers
– Lettuce, greens, spinach
– Parsnips
– Scallions
– Squash of all kinds… butternut, delicata, gourds, pattypans, pumpkins, spaghetti, zucchini…
You can still plant some flowers and herbs from seed, too…
– Cilantro
– Chives
– Dill
– Cosmos
– Nasturtiums
– Sunflowers
– Zinnias

I’ve gone all blue and white on the deck this year. Blue flower pots with white flowers, blue and white pillows and rug, new blue cushions for the chairs (finally! – it took me 2 years to find affordable ones that fit these chairs), and I even stained the side table blue.


Leave a comment