
These cute Christmas signs are so easy to make, you might just want to make oodles of them! Give them as gifts, sell them at a Christmas market, or place several around your own porch and property.
I think they would make super cute gifts to give and get!
This sign took me less than an hour to make, the longest part was waiting for the paint to dry. I couldn’t wait to make it once the idea came to me!
To make yourself a fun Christmas sign for the front porch, you need very few supplies. These are so fast to whip up, so easy (I promise), and inexpensive, but oh so cute.
The board can be sourced from pallets, old fence or barn boards (the chippier the paint, the better!), or purchased from the hardware store. Most box hardware stores will do 1 cut for free, so you’ll end up with 2 boards as they are sold in 8 foot lengths.
- Pine board (mine is a 1×6). You can buy a wider one, if you would like. The boards are 8 feet long, so ask them to cut it in half so that you have two boards.
- Paint in a few different colours.
- Letter Stencils
- Paint brushes (I used the cheap sponge ones for this project)
- Paint markers
- Jute twine
- Ornaments like rusty bells or stars to tie around the top.
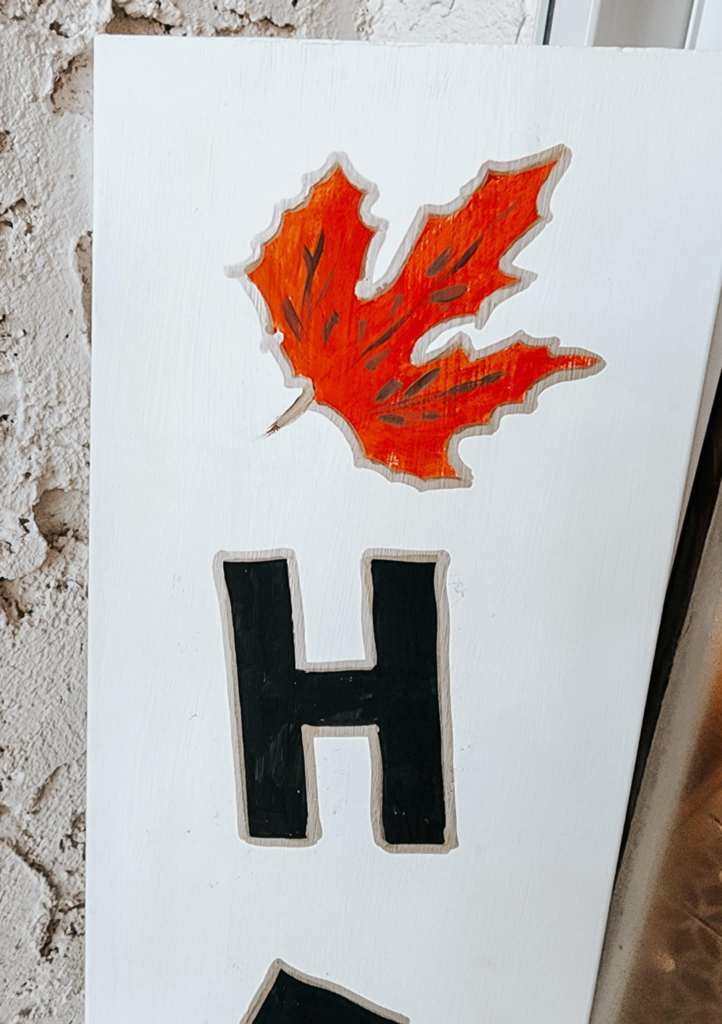
STEP 1 – Paint the background of the board any colour that you like. My board has a fall theme on the back of it, so the sign had already been painted white on both sides.
I decided to make the Christmassy side a very Christmas green colour.
You may also be able to pick these bottle of acrylic paints up at your local dollar store, Michael’s, any shop carrying craft supplies. If you have leftover paints from previous projects, you can change the tint by adding a bit of black or white to it to make it brighter, or moodier. Red would also be very festive.
Don’t be afraid to play around with your paints. I added a wee bit of brown around the edges, while the green was still wet, to add a bit of ‘dinge’ to it.
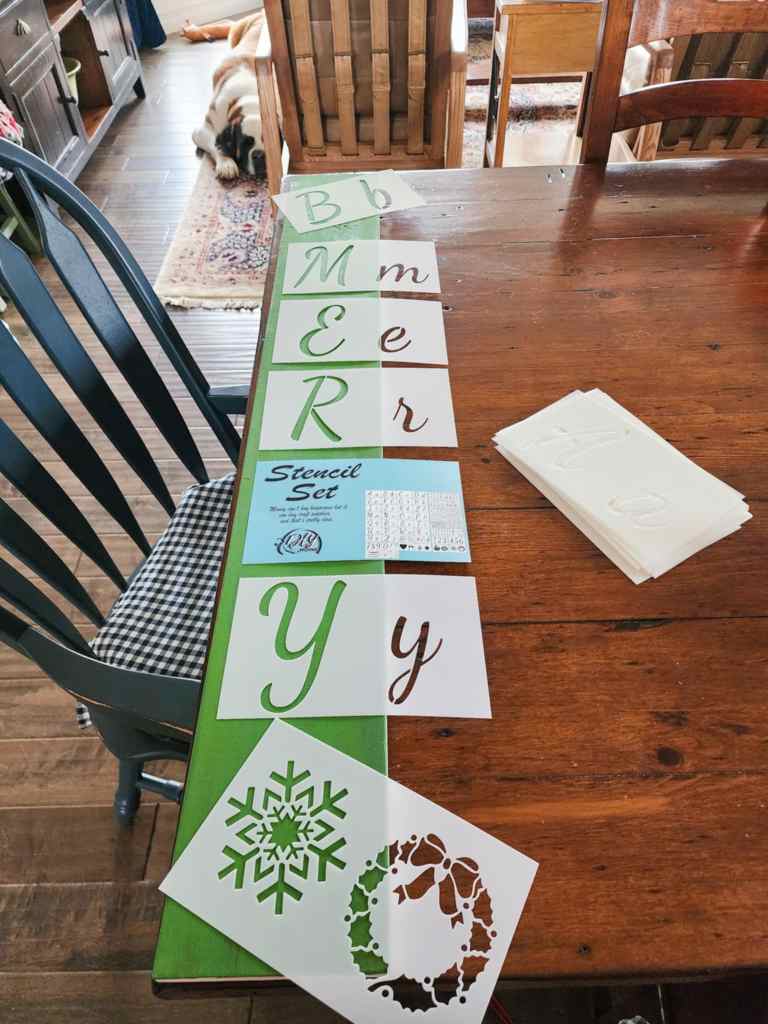
STEP 2. Lay out your letter stencils so that the letters are equal distance apart and centered on the board. I just eye balled mine, but if you are really particular, a yardstick or ruler can be used.
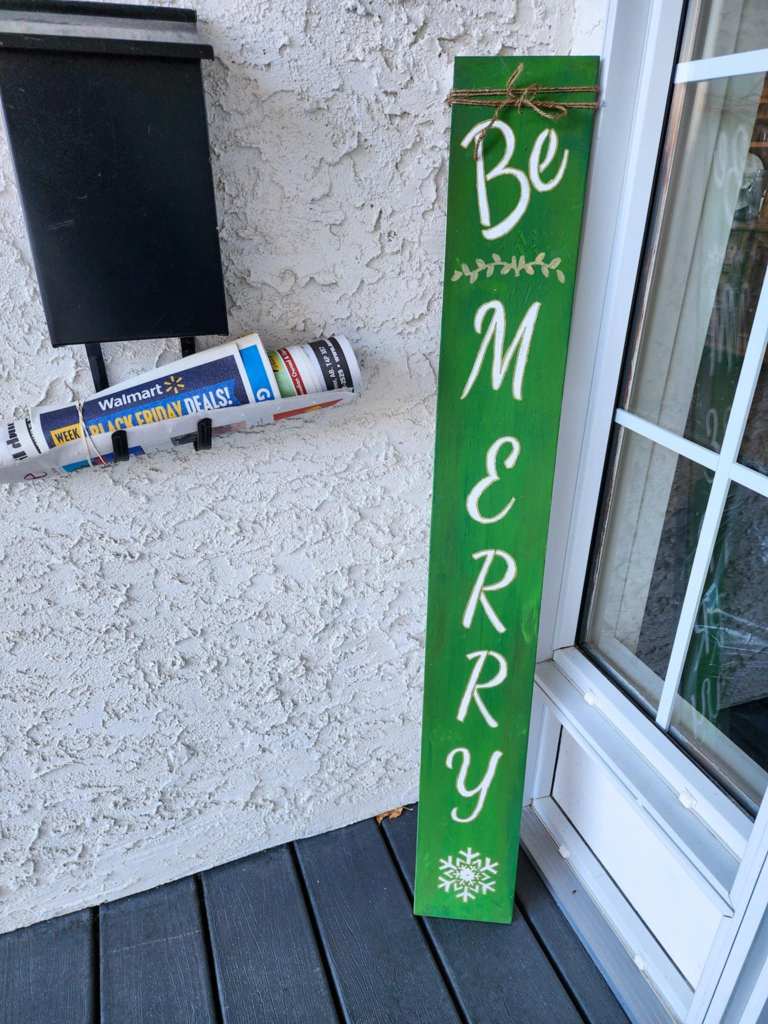
I decided to go with ‘Be MERRY’, followed by a snowflake, but there are so many things that you can write…
- Snow
- Joy
- X-mas
- Believe
- Welcome
- Noel
- Christmas
STEP 3. Tape the letters into place so they do not move about while you are sponging the letters with paint.
STEP 4. Stamp the paint on your letters in several thin coats to prevent getting splodgy edges. I used the tip of one of the sponge brushes, but if you have a big of kitchen sponge, tear off a corner and use that.
If your edges are a bit wobbly, paint pens are your best friends!

STEP 5. Outline each letter with the gold paint pen. This will even out any lumpy bits, paint that bled under the stencil a little bit.
I also outlined the snowflake at the bottom, and made a little leaf motif underneath the word ‘Be’. The paint pens make your letters stand out and give them a bit of something special.
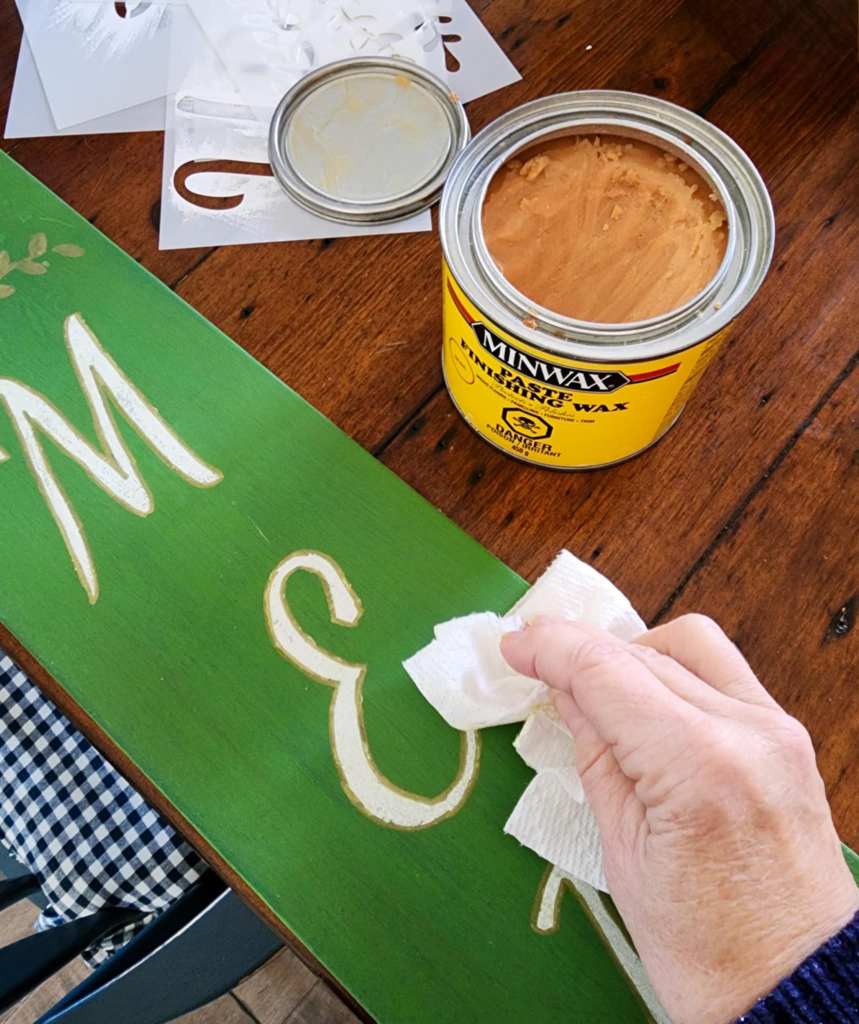
STEP 6. If your sign is going to be in the snow or rain, you want to protect the paint with a paste wax or varnish. To use the varnish, my daughter, an artist, says to make sure it says non-yellowing.
My sign is under the eaves so will never get wet, but I still made sure to give it a good coat of finishing wax for protection and a bit of shine.
Put the wax on paper towel or a soft cloth. Rub it on all over the board, covering it from top to toe. Let sit for a few minutes and then rub it to buff it up and bring out the shine.
STEP 7. Add a bit of string for rustic charm, the rusty stars, a glittery string of balls…
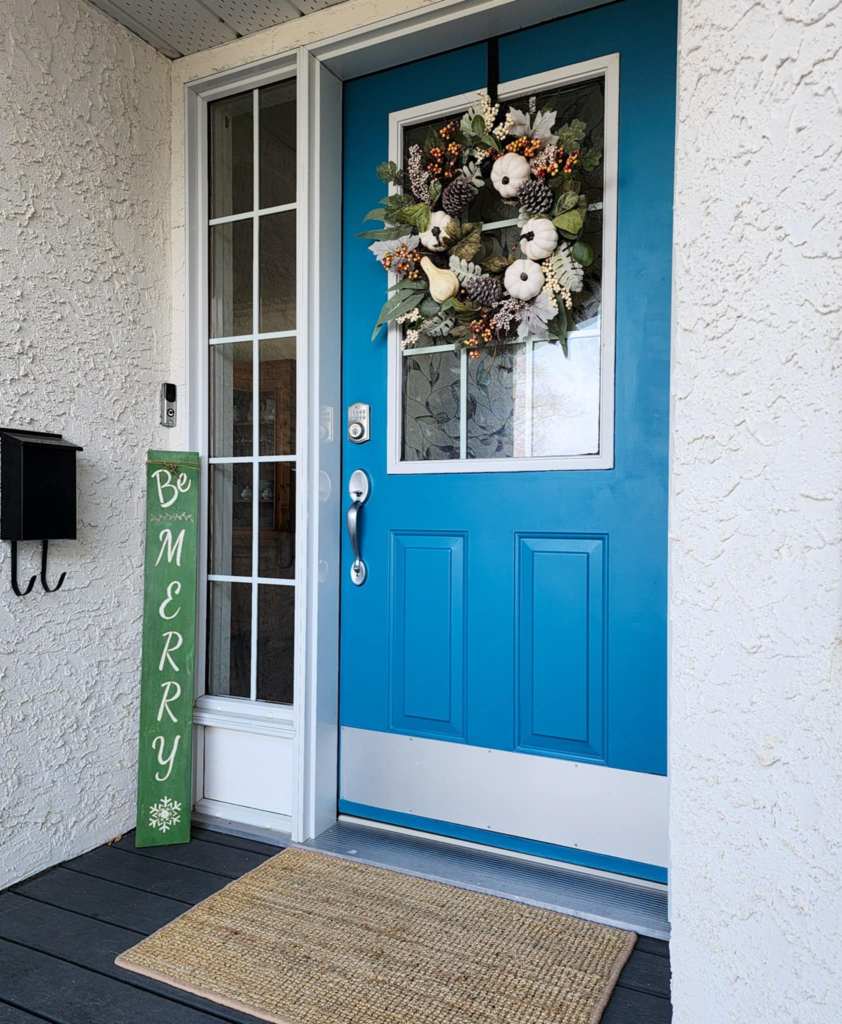
As you can see, I have not yet started my Christmas decorating outside. The porch sign is the one and only thing out there so far.
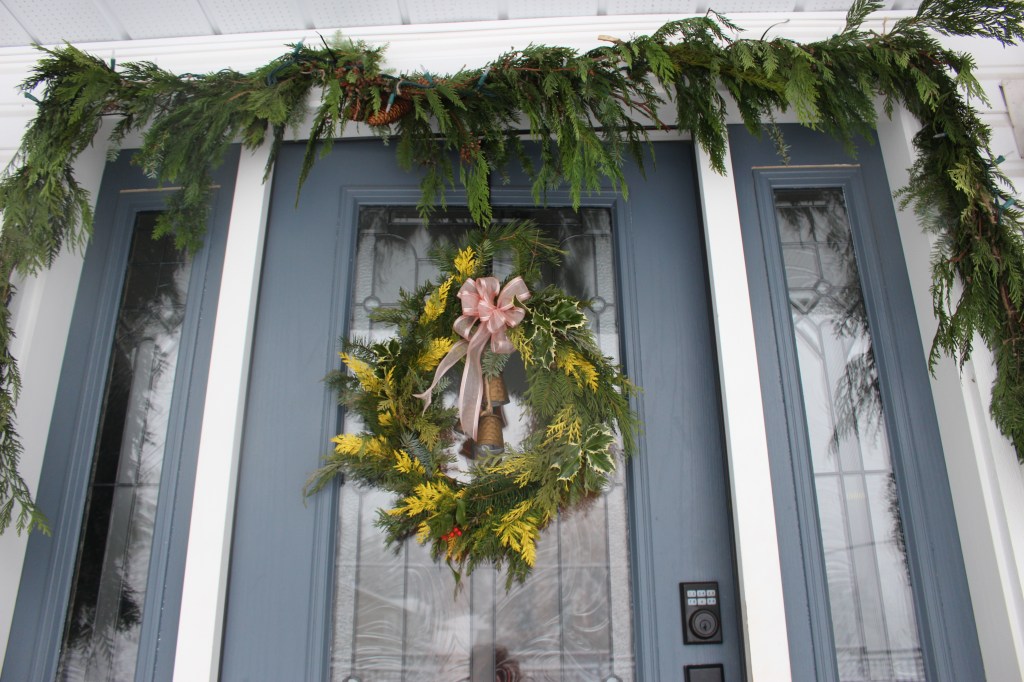
I will be keeping it simple with my sign, a wreath, and an evergreen garland with lights. Similar to what I had here at the acreage, but I made that garland myself with clippings from all the trees on the property. This time, I am going with a homemade wreath but a store bought garden that I wrapped with plug-in lights. Battery lights do not work very well in our cold weather here on the prairies.


Leave a comment